Host a WordPress Website on AWS EC2 for Free
Today, we’re going to talk about How To Host a WordPress Website on AWS EC2 for Free. We can do this using the AWS free tier account, and it won’t cost you anything for a whole year. Here I aim to guide you through the steps to host a WordPress website easily. If you’re unfamiliar with AWS or find the technical terms confusing, don’t worry. Just follow the steps I have explained.
Step 01 :Log in and navigate to the EC2 Dashboard
To begin, you need to log in to the AWS site and create an account. Visit https://aws.amazon.com and click the sign-in button in the top right corner. Then you can see a form like below.
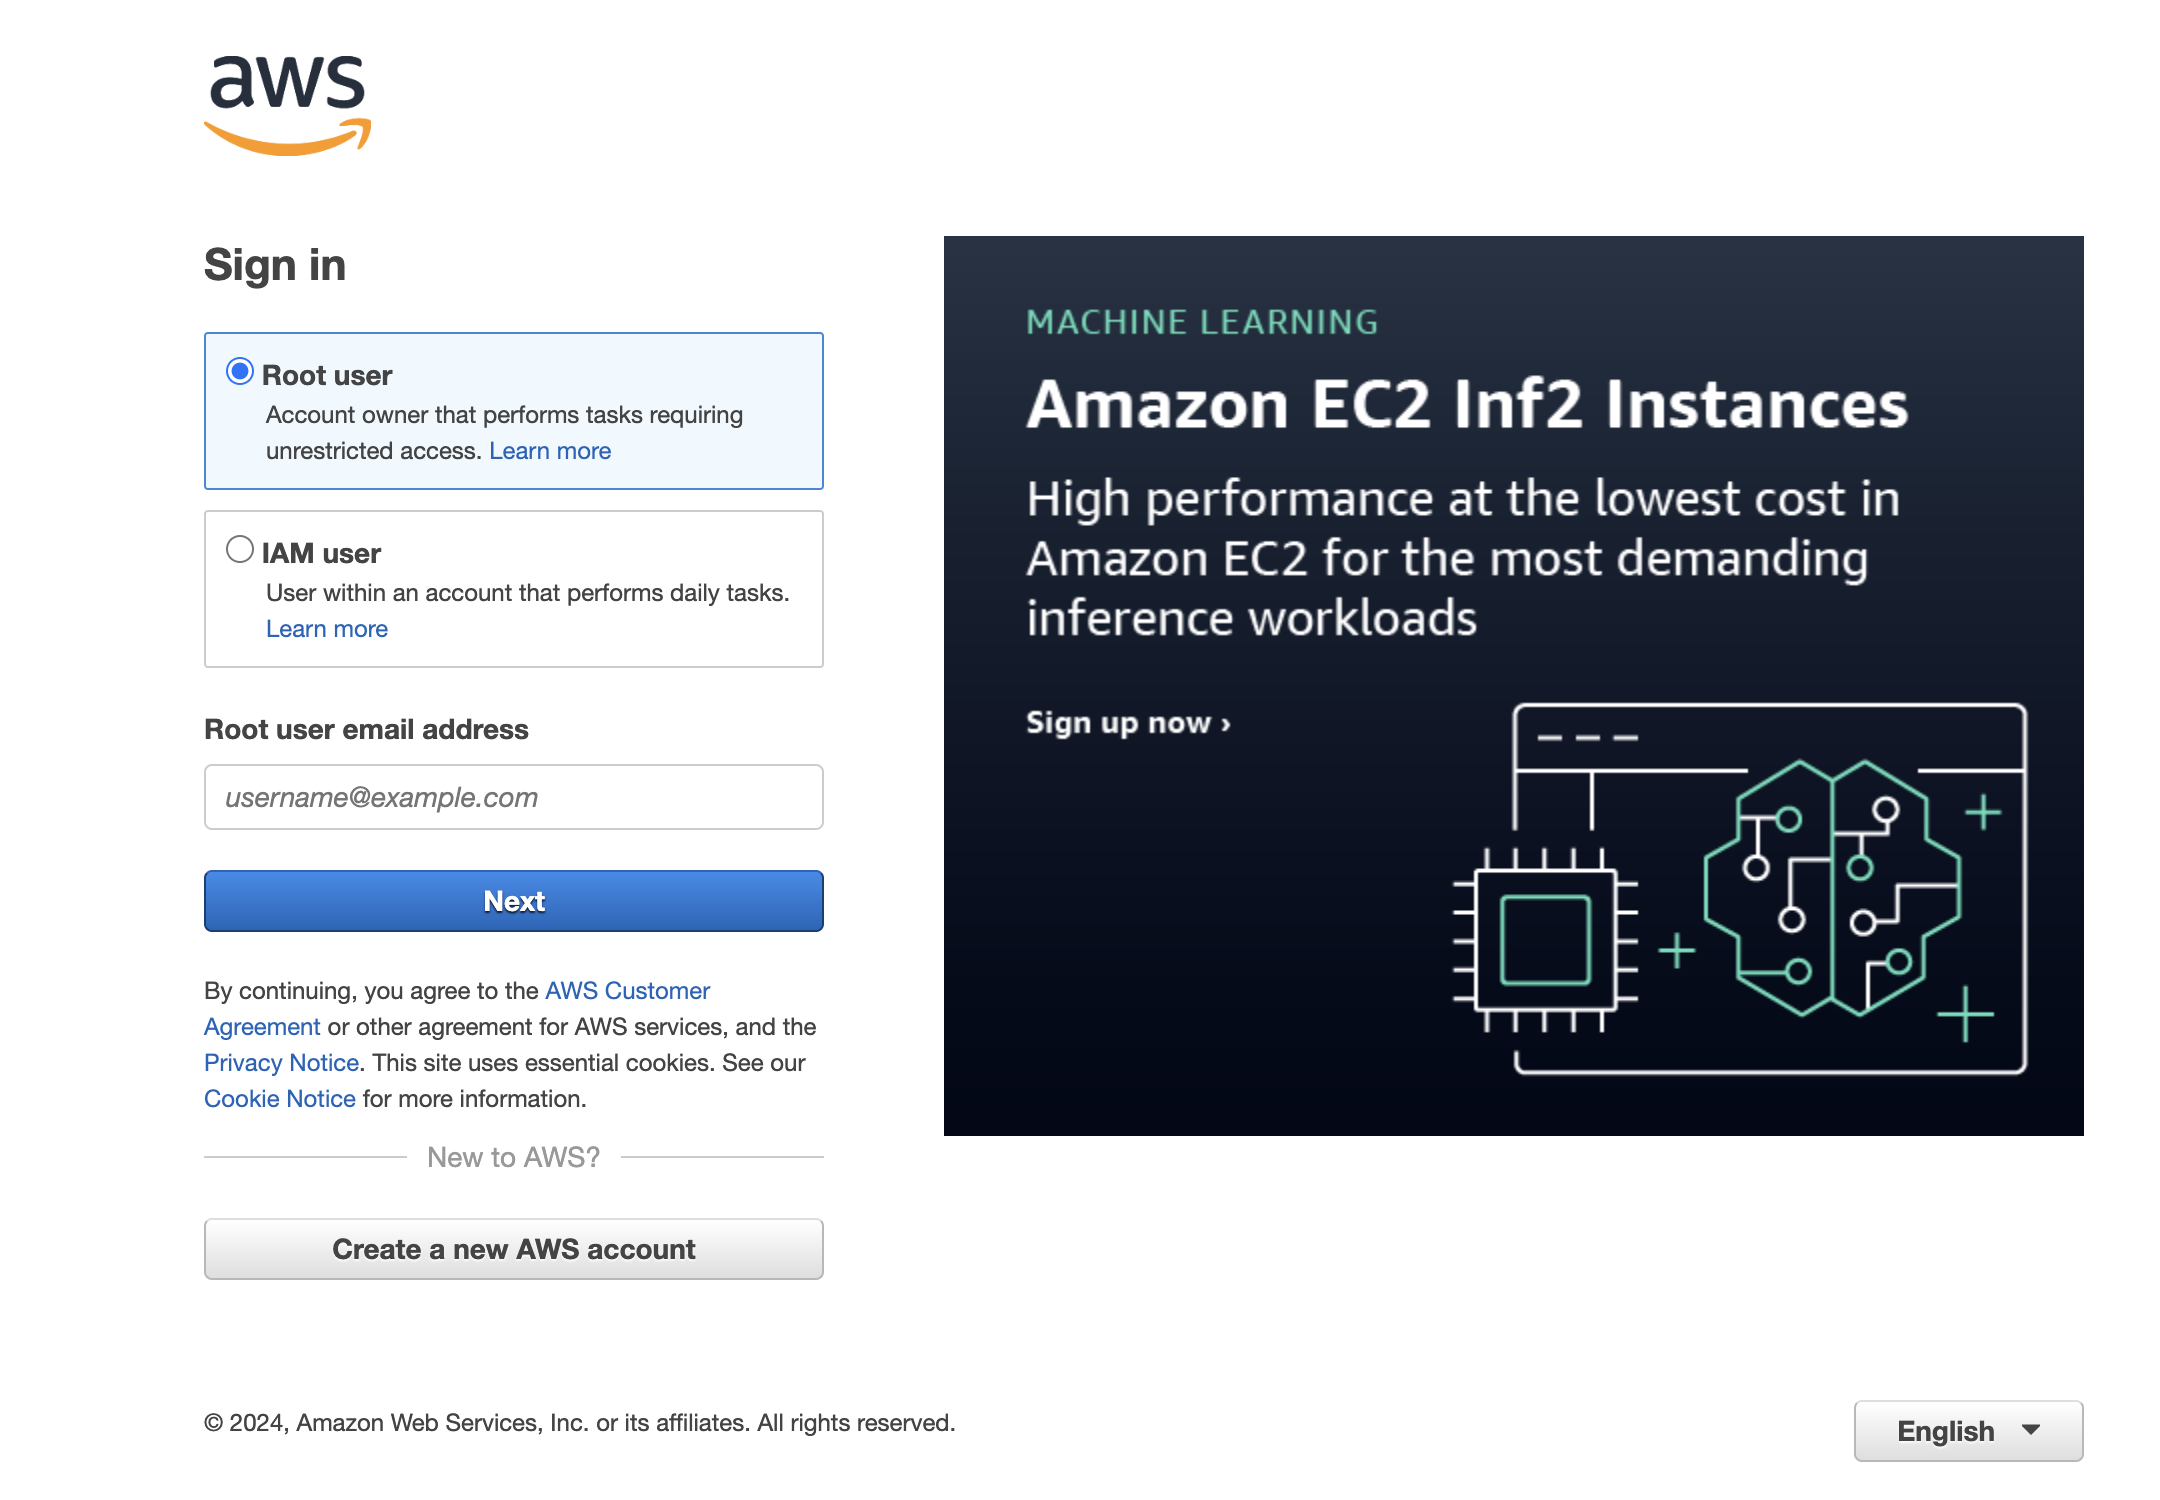
Now create a new AWS account if you haven’t or sign in if you have an account. As a best practice please try to logging in with your IAM user. If you do not have an IAM user, it is not an issue here you can do that from your Root user.
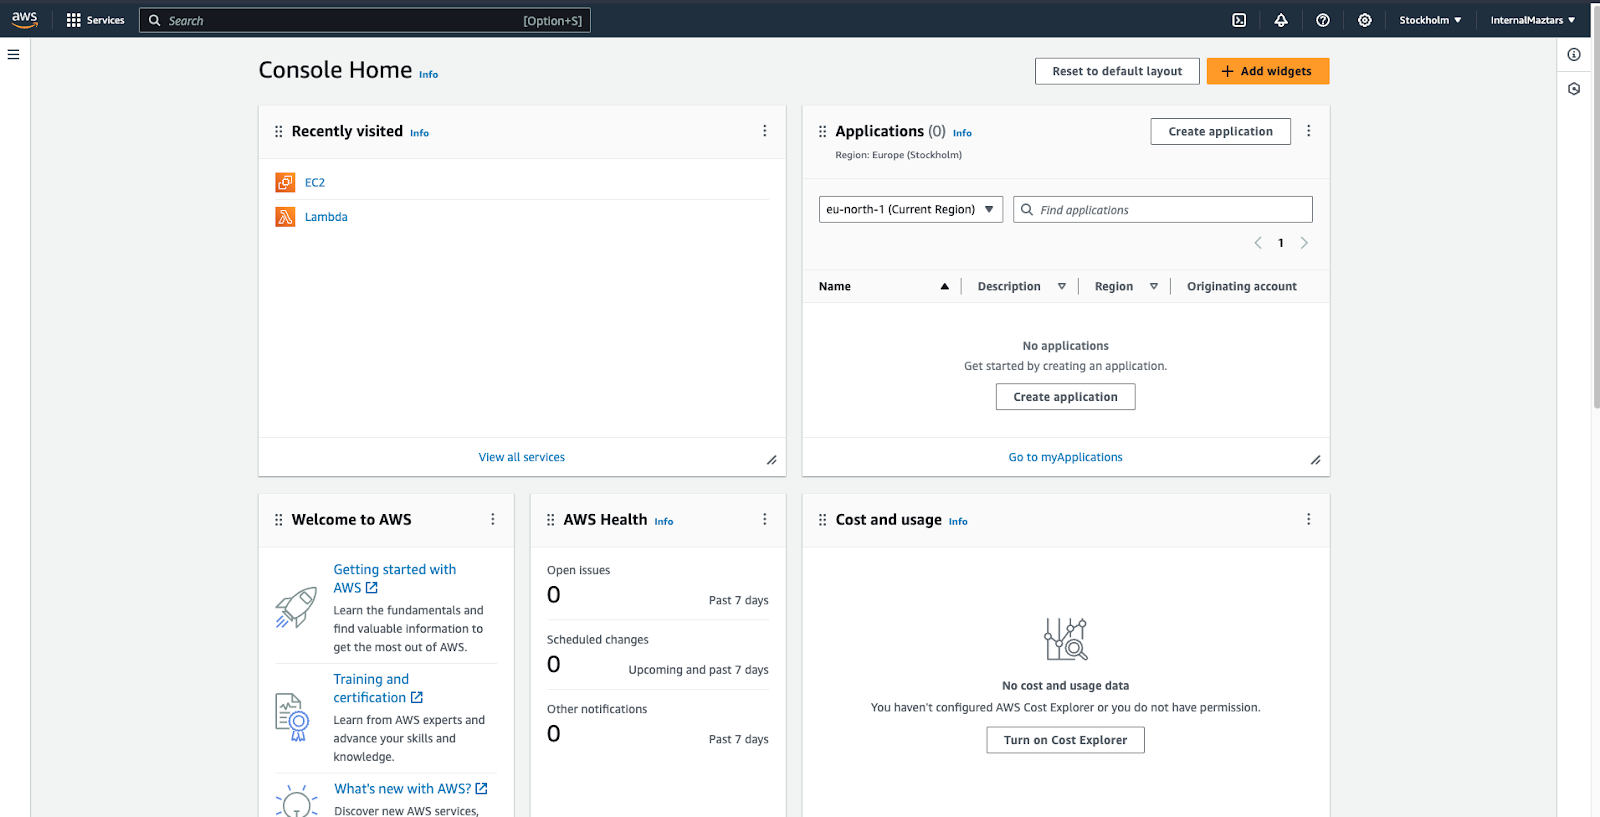
After you logged in you need to go to the AWS Management Console. Then you can see below screen.
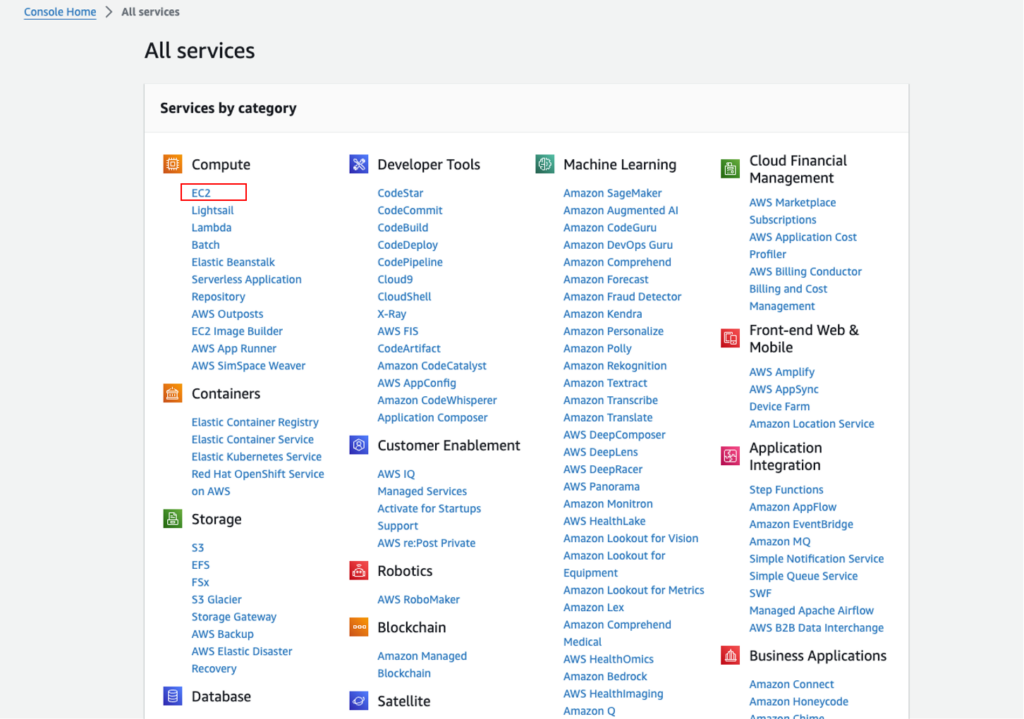
Then click on the Service button on top left corner and click All services tab.
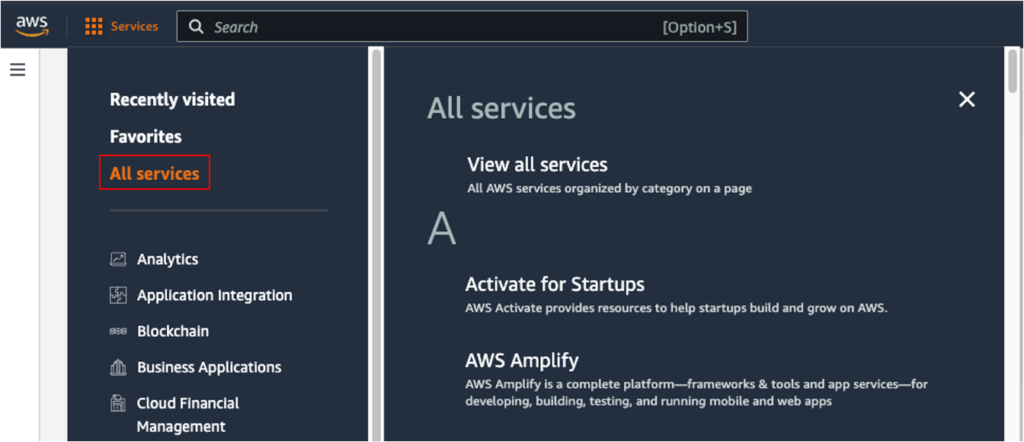
After that you can see Services lift like below. You can see there are lot of Service categories provided by AWS. Today we need to create EC2 instance, so click on the EC2 under Compute category.
Step 02 : Launch instance
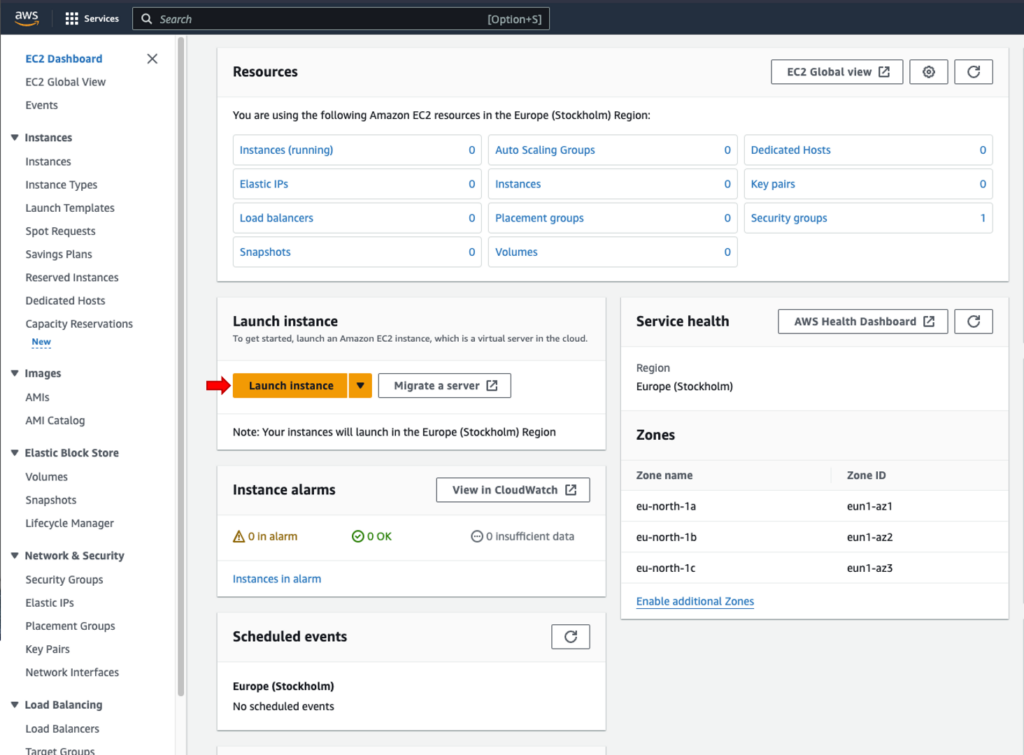
After that, you’ll encounter the EC2 Dashboard as shown below. This dashboard provides key metrics and information related to your EC2 instances. Now we don’t have any running instances. To set up hosting for our WordPress website, we need to create an EC2 instance. Just click on the ‘Launch Instance’ button.
Step 03 : Set a name for the instance and choose an Amazon Machine Image
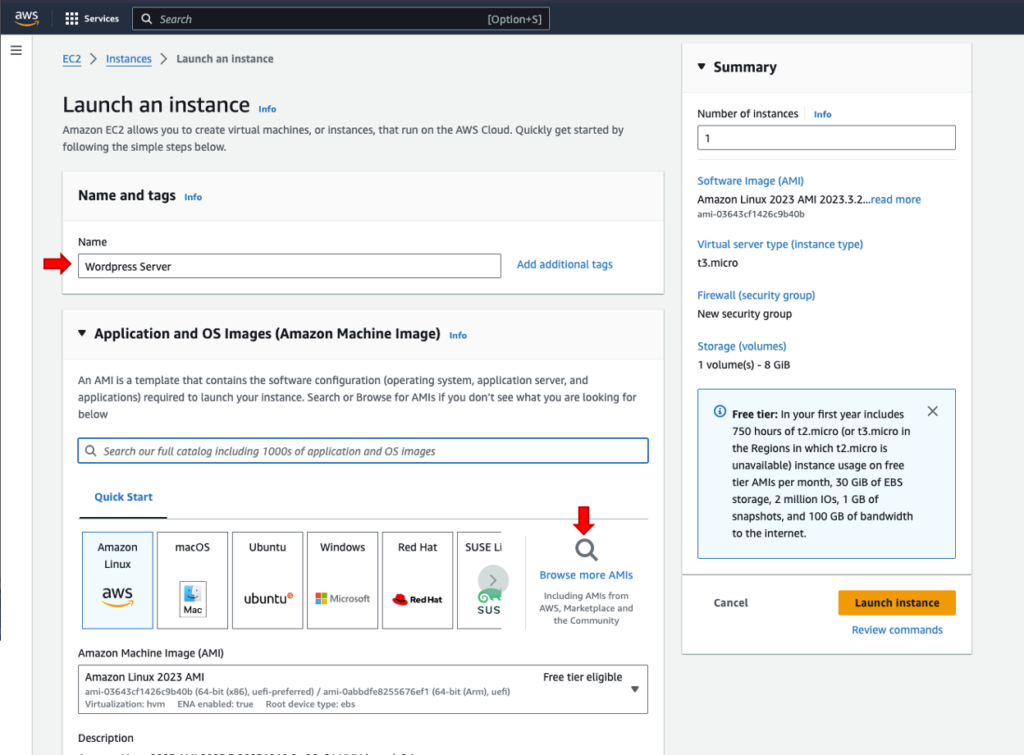
When you click the ‘Launch instance’ button in the UI shown above, a new screen will appear. First thing, you need to assign a name to the server. I have used ‘WordPress Server’ as an example, but feel free to pick any name that suits your preference.
Then we need to select Amazon Machine Image (AMI), Under the ‘Application and OS Images (Amazon Machine Image)‘ title you can see some operating systems and application servers. Click on ‘Browse more AMIs’ (the second red arrow in the interface below).
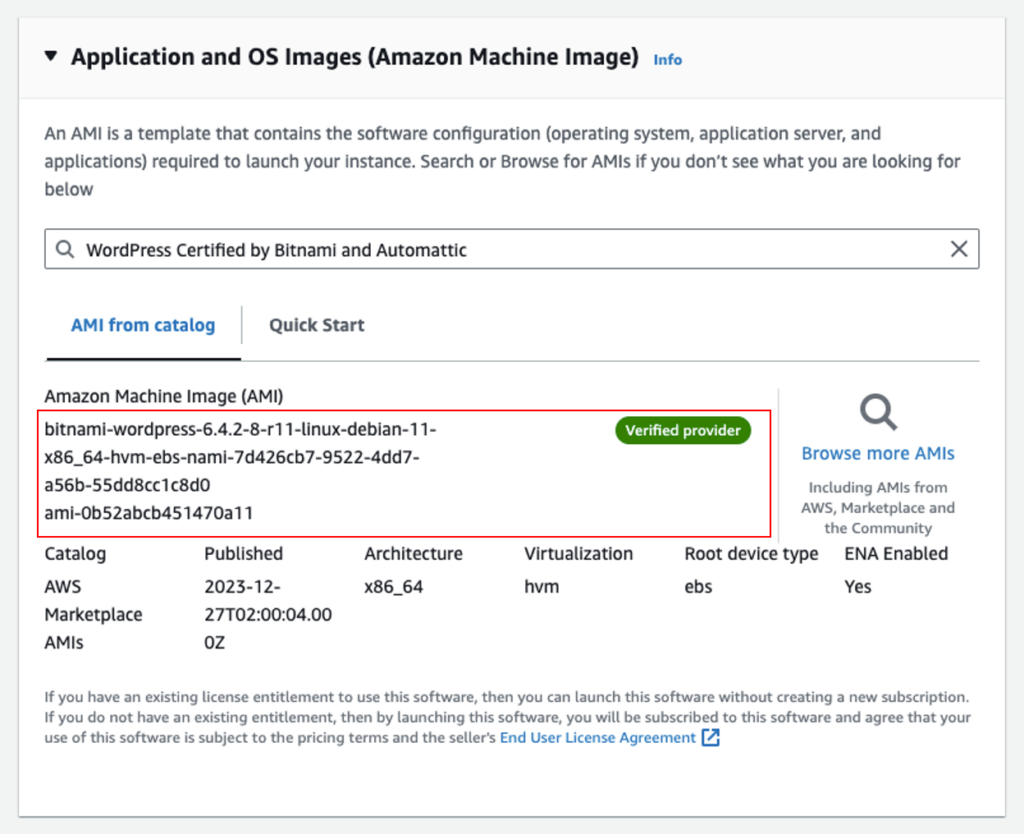
After that, you will be directed to the AMIs interface, where you can view a list of all available AMI products.

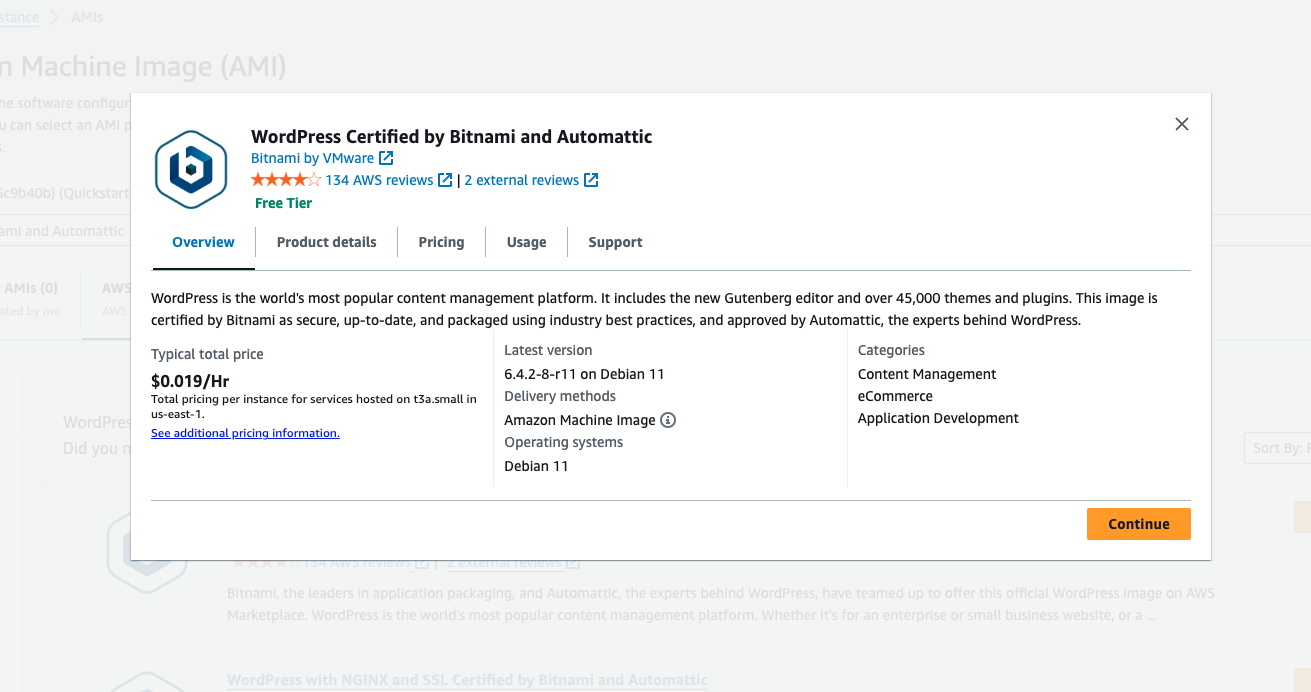
Now, click on the selected AMI text input box and search for ‘WordPress Certified by Bitnami Automatic’ (simply copy and paste the provided AMI name). Next, select the first one from the list, as indicated by the red-colored box in the image below.
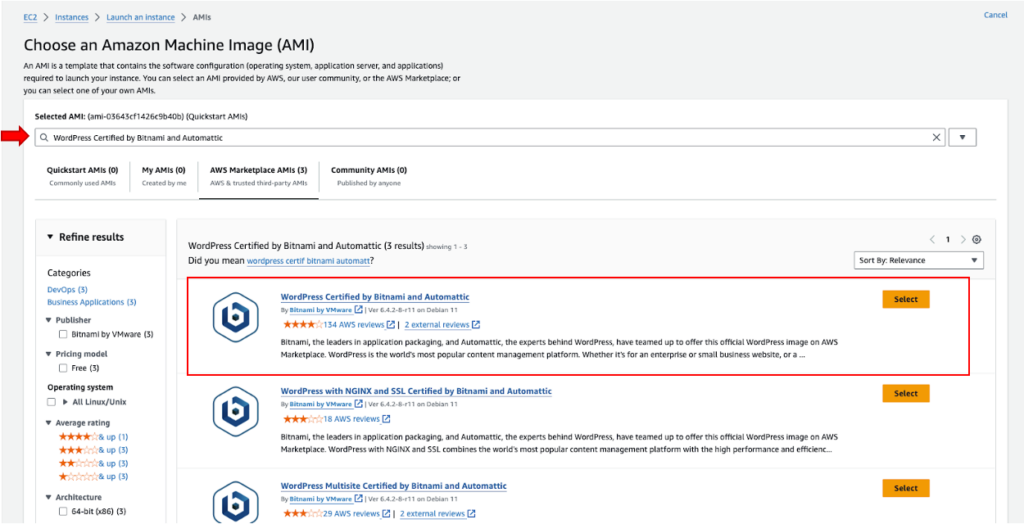
WordPress Certified by Bitnami Automatic’ is a pre-configured and certified image of the WordPress content management system provided by Bitnami. Clicking on it reveals the details of that AMI. In the Overview section, you can observe the typical total price as $0.019 per hour. Don’t worry; we can use it freely during our one-year free tier period. Now, press the ‘Continue’ button in the bottom right corner.
Next, you can view the details of the selected AMI as shown below.
Step 04 : Choose Instance Type and Create key pair
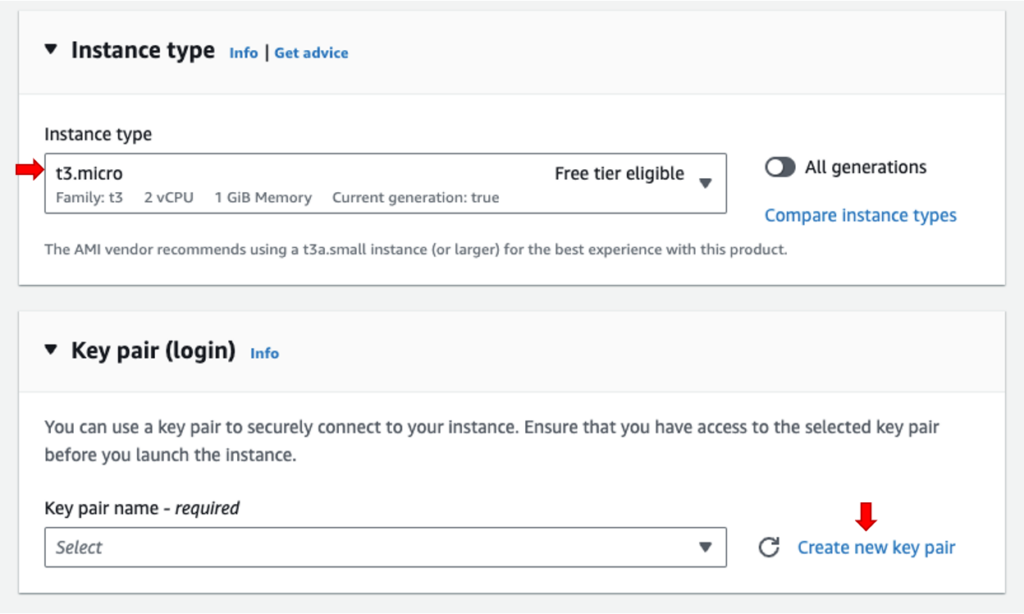
In the ‘Instance type’ section, you don’t need to select anything; simply use the default type (t3.micro) as shown in the image below. This type is eligible for the free tier. If you decide to change the instance type, make sure to select a Free Tier eligible type; otherwise, charges may apply. However, for a WordPress website, the default selection of t3.micro is suitable.
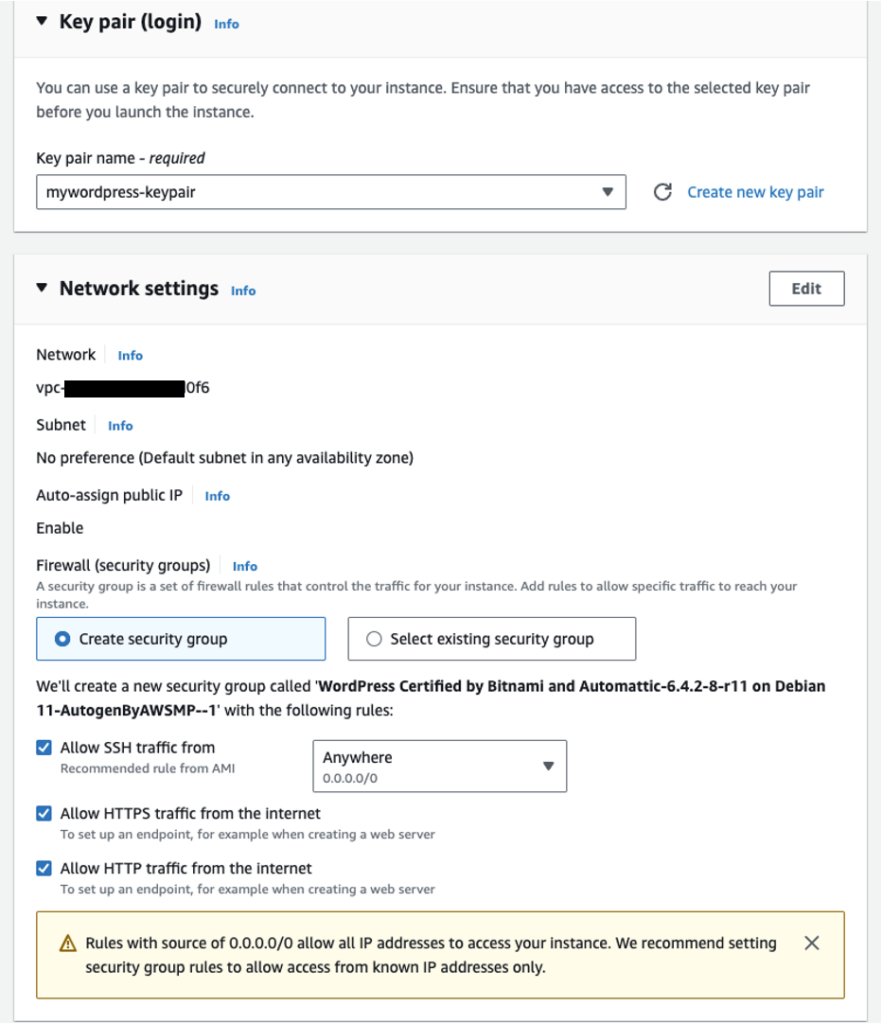
After that, we need to create a key pair. This will be used to securely connect to your instance. If you don’t have any idea about it, don’t worry; it will be useful in the future, not during this process. Click on ‘Create new key pair,’ as indicated by the second red arrow in the interface below.
Now, you will see the ‘Create Key Pair’ screen. First, enter a name of your choice in the ‘Key Pair Name’ text box. After that, do not change any other settings; simply use the default configurations. Finally, click on the ‘Create Key Pair’ button in the bottom right corner.
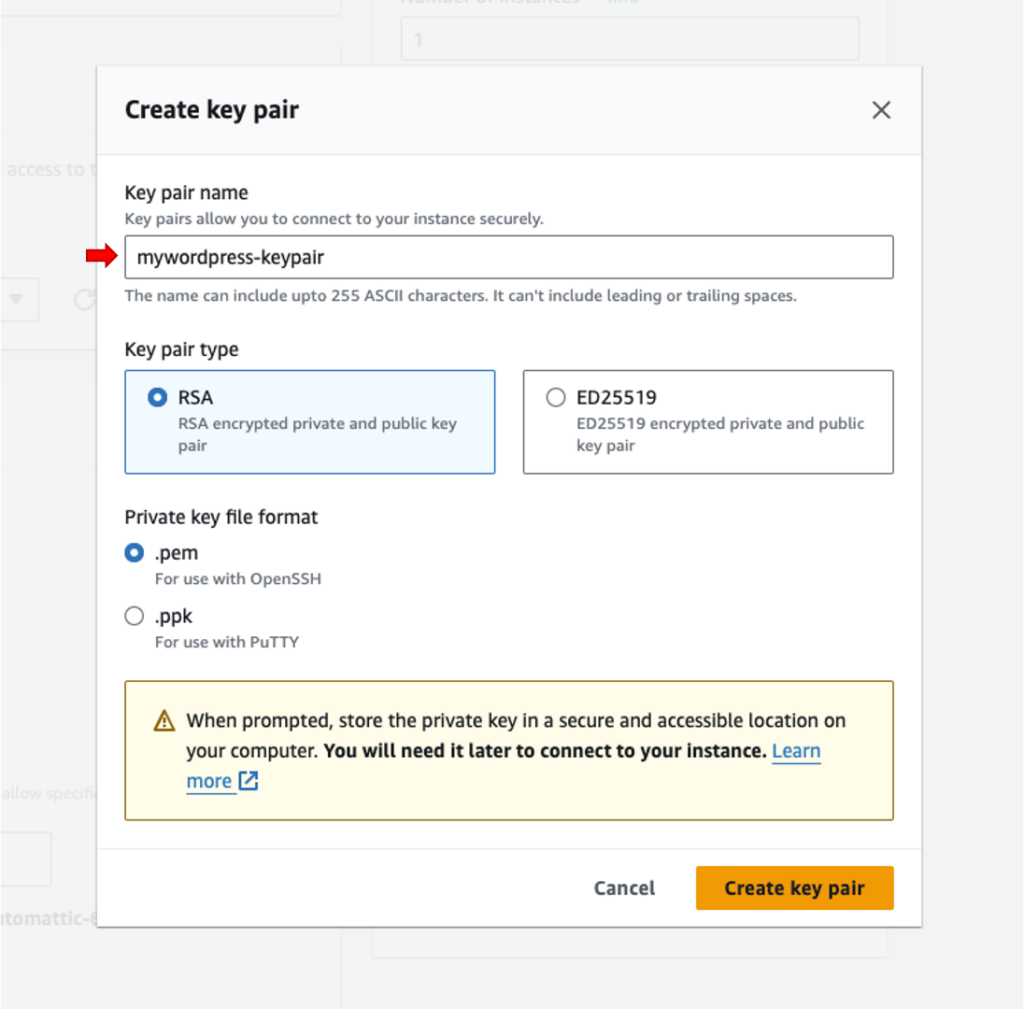
Then, you can download the key pair file. Keep this file secure, you will need it in the future to access this instance using OpenSSH or Putty.
Step 05 : Network settings
In the ‘Network Settings’ section, stick to the default configurations. If desired, you can modify SSH ‘0.0.0.0/0’ to your IP for enhanced security. Using ‘0.0.0.0/0’ allows access from anywhere with the correct credentials or keys. If you choose to change it to your IP, access will be restricted to devices from that specific IP. If you’re unsure about this, feel free to skip; I’ll provide an explanation in the future.


Step 06 : Configure storage
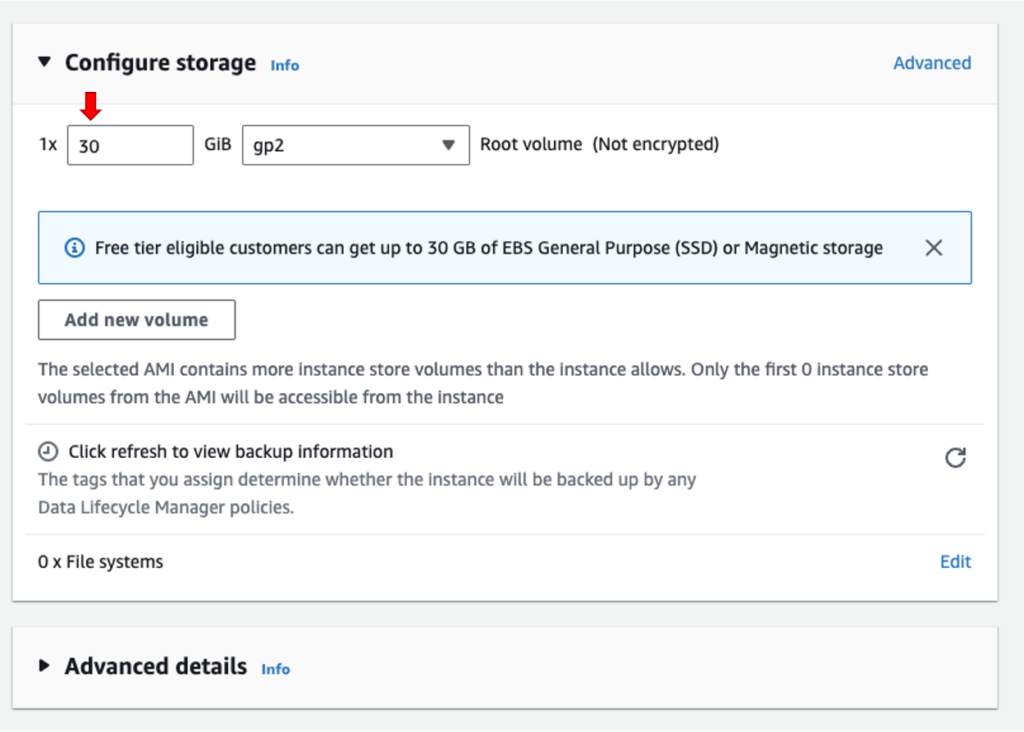
In the ‘Configure Storage’ section, you can set up to 30 GB since you are a Free Tier-eligible customer. Increase that value to 30 GiB if you want.
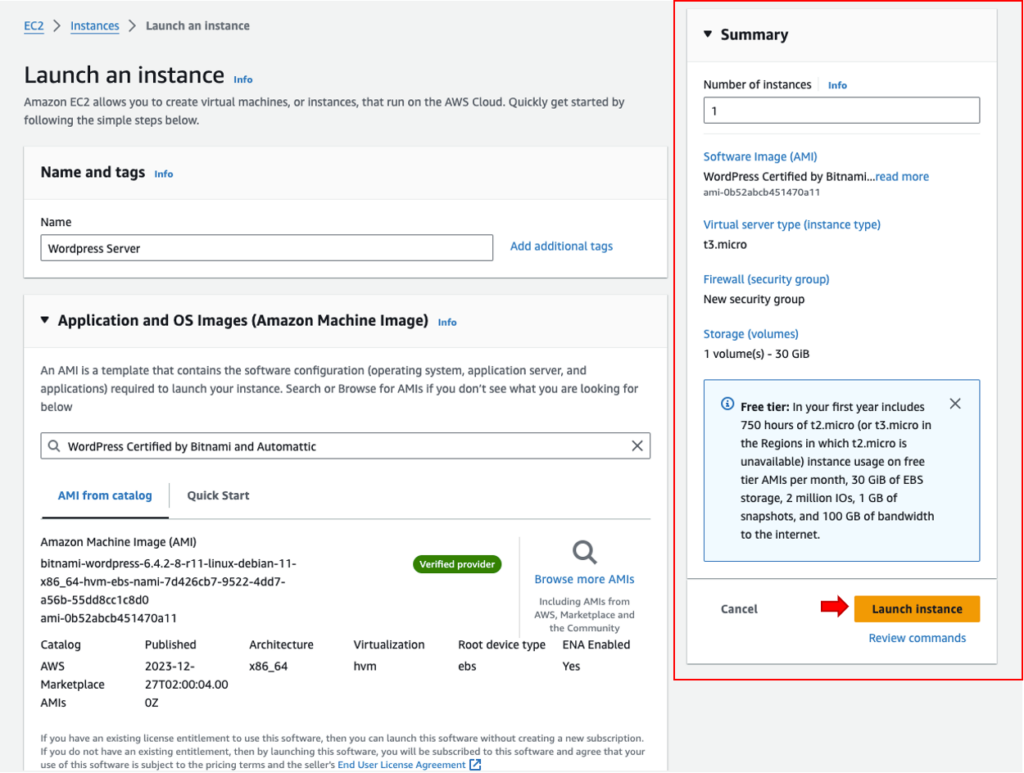
Step 07 : Summary
Now you are all set; on the right side, you can see the summary of your instance. Just review it and click on the ‘Launch Instance’ button at the bottom of the summary section.
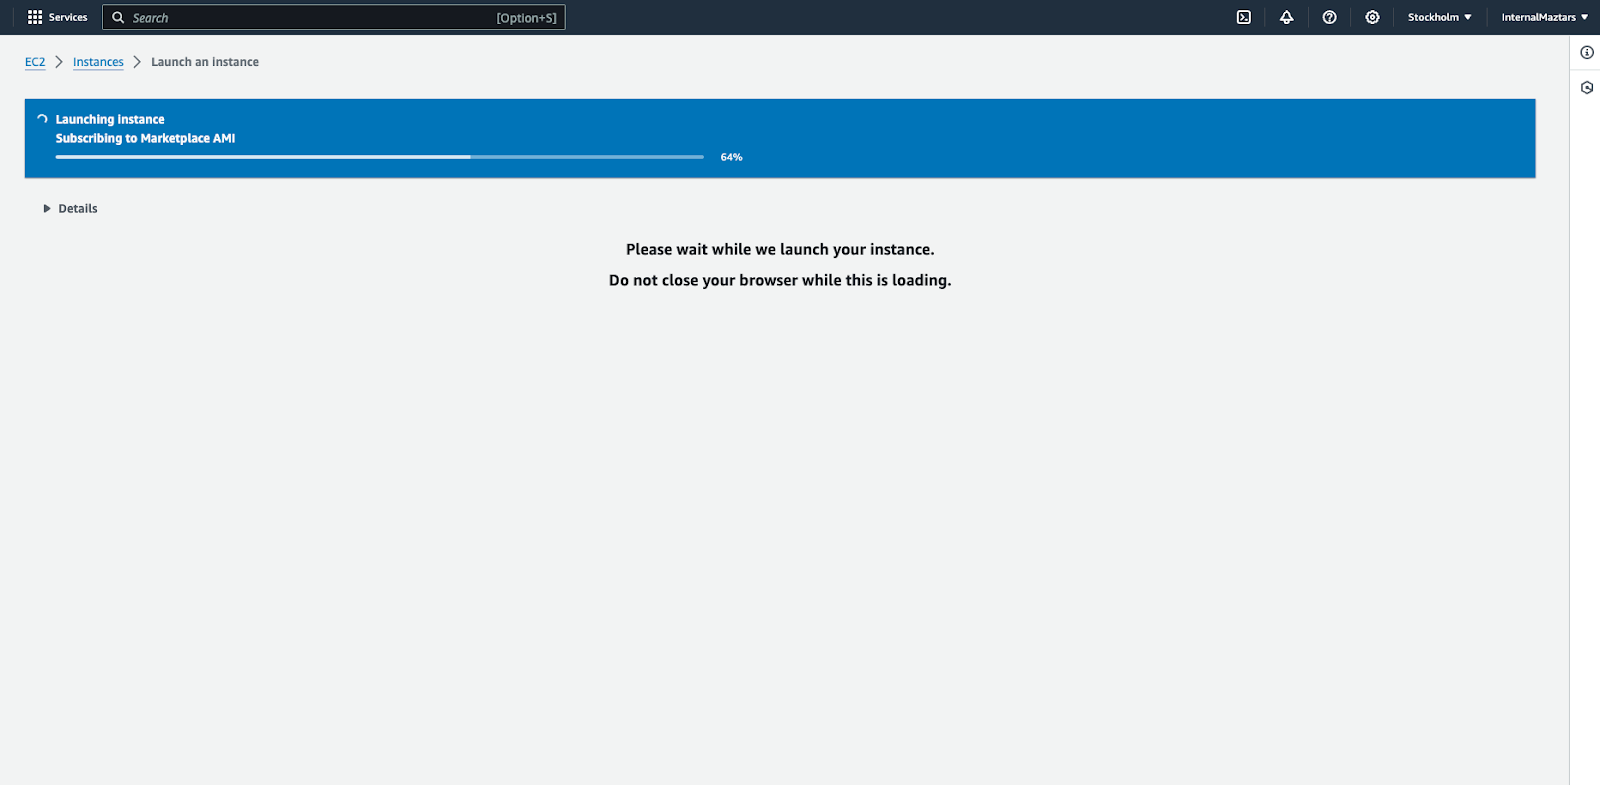
Now you can see the instance is launching. Please wait a few minutes until it completes. Make sure not to close the browser until you see the success screen.
Now you can see the success status with a green bar. It means your instance is ready now.

Step 08 : Test WordPress website in the browser
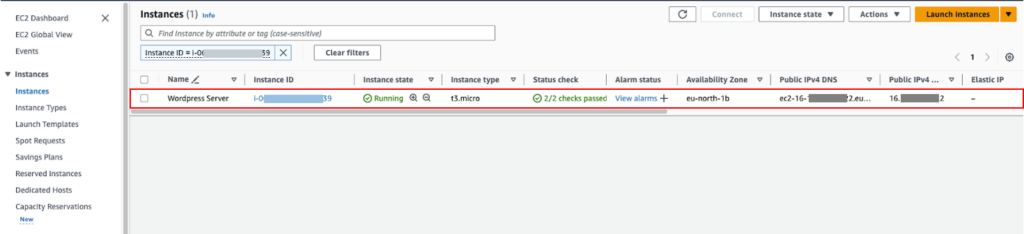
Then, move to the AWS Instances screen. You can see your instance is in the ‘Running’ status. Click on the instance ID to view all details of the instance.
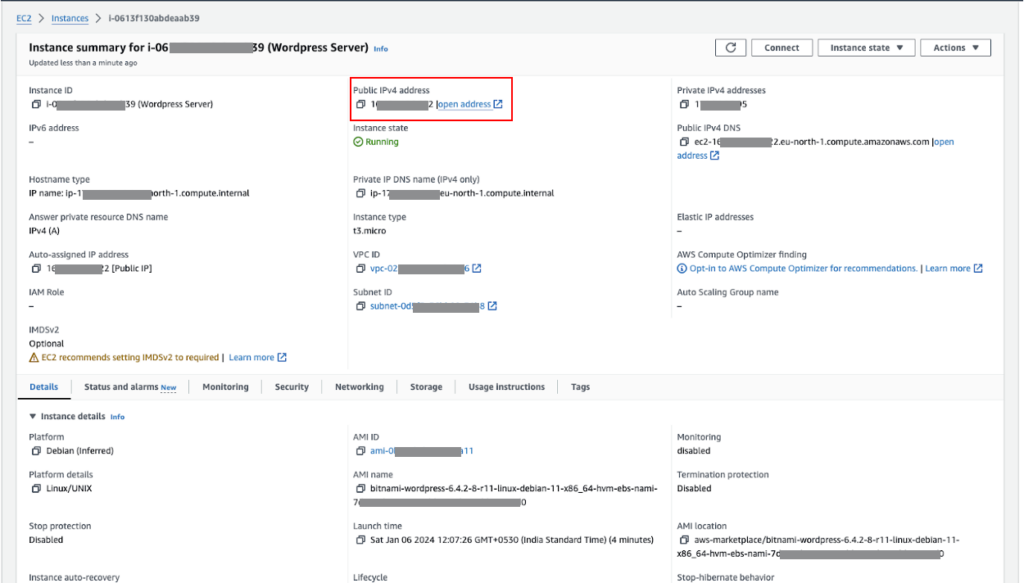
In the screen below, you can find all the details of your instance. Copy the IP under ‘Public IPv4 address’ (as indicated in the red-colored box). Then, paste it into your browser to view your WordPress site. Alternatively, you can click on the ‘Open address’ text under the ‘Public IPv4 address’ section.
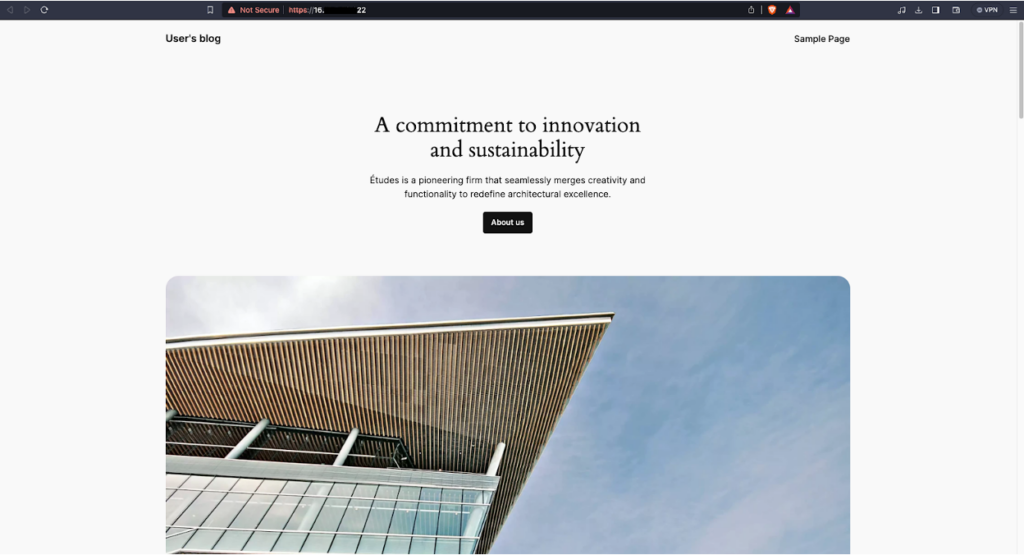
Next, you will see your default WordPress site, as shown below. You can connect that Public IP with your DNS provider. Keep in mind that if you restart your instance at any time, the IP may change. So, be sure to update it if you restart your EC2 instance. To avoid this, you can create an Elastic IP address, but it will incur charges in some regions, so just keep that in mind.
Step 09 : Log in to the WordPress Admin panel
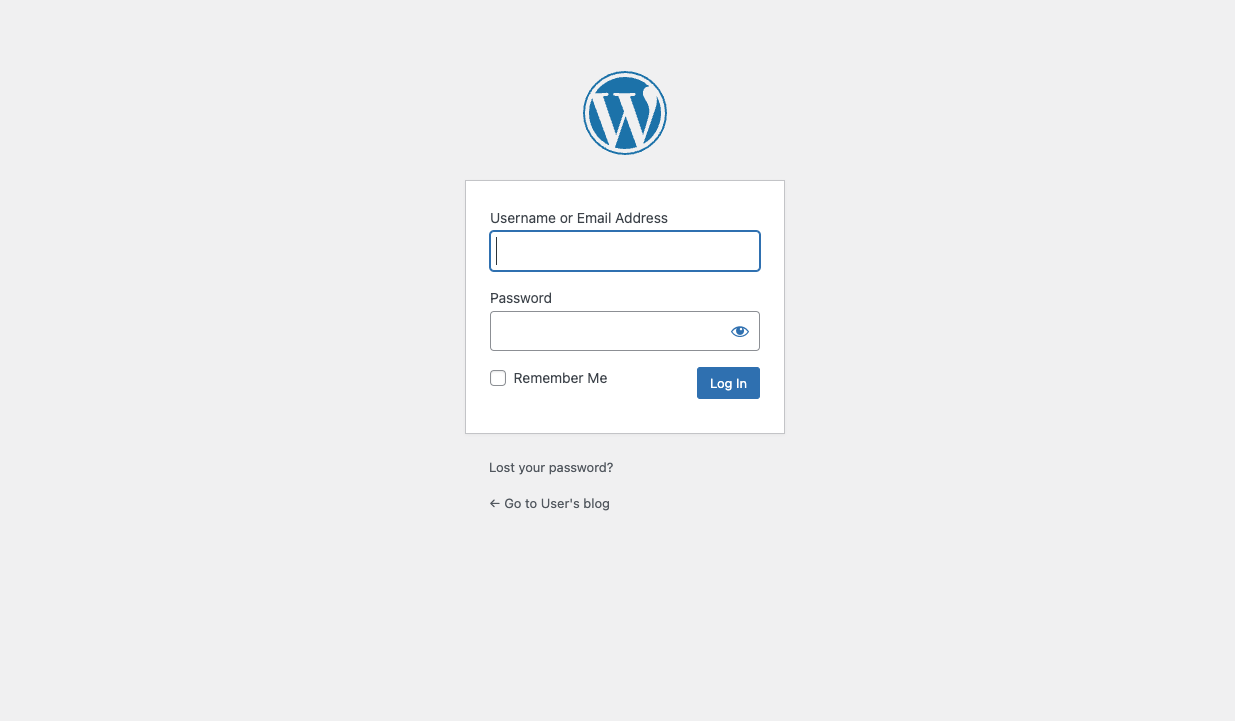
Now, we need to access the admin panel. To do that, add ‘/wp-admin’ after your IP address in the browser (example: https://your_ip/wp-admin, replace ‘your_ip‘ with your public IP). Then you can see Admin panel Login screen like below.
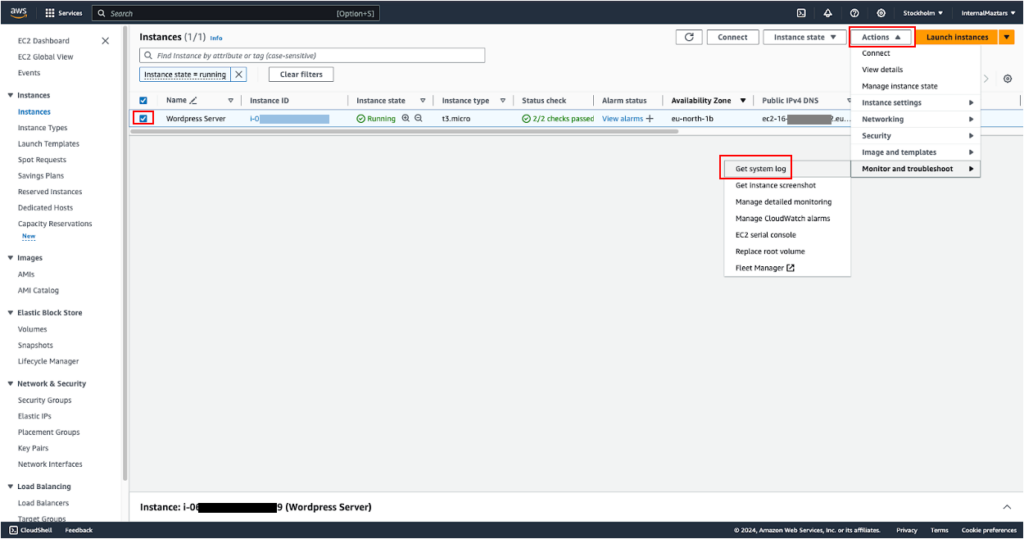
Now, we need to find our WordPress account username and password. Select your instance and click on the ‘Action’ button at the top. In the list of operations, click on ‘Monitor and troubleshoot,’ and then click on ‘Get system log’ (follow the red-colored boxes).
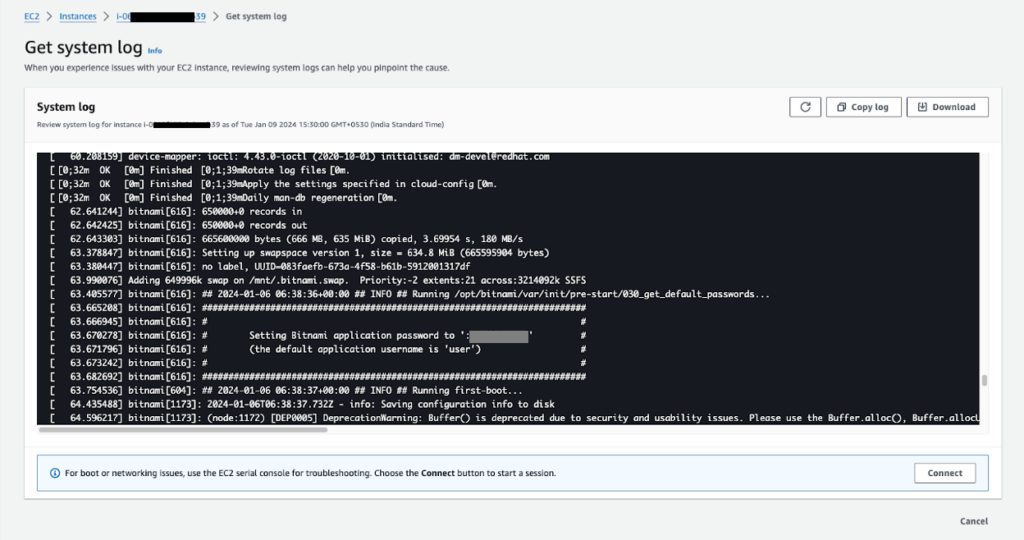
Now, the system logs will appear as shown below. Please scroll through the system log until you find a box that includes the username and password, similar to the image below. In that, you can see the default username is ‘user,’ and a default password for the WordPress account. Copy the username and password, and use them on the admin panel login screen.
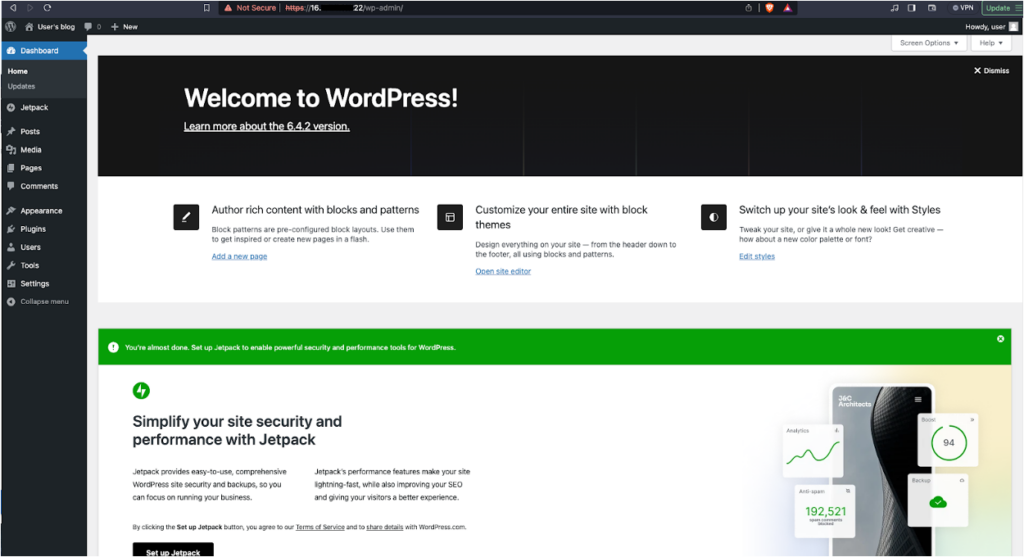
After you log in successfully, you can see the WordPress admin panel like below. Please make sure to change the default username and password after you log in for the first time
If you have any problems with ‘Host a WordPress Website on AWS EC2,’ feel free to comment on it or contact us using messenger. Let’s meet in the next lesson.
Happy Coding!
How to convert Angular project to Android app