Registration Form Design Using HTML & CSS
Hello, Today we are going to create a simple Registration form only using HTML and CSS. First of all, you have to open your editor and Then, in your HTML file, you have to write the below codes. Here I want to give an example of how we add various elements in HTML.
Html file for registration form
<!DOCTYPE html>
<html>
<head >
<title>Registration</title>
</head>
<body>
<div class="simple-form">
<form id="box">
<h2>Member Registration</h2>
<label id="p1">Are You a?  </label>
Student  <input type="checkbox" name="type" value="student">
Teacher  <input type="checkbox" name="type" value="teacher">
<br><br>
<input type="text" class="indata" placeholder="Enter Your Full name" required="" >
<br><br>
<input type="text" class="indata" placeholder="Enter Your Registration Number" required="" >
<br><br>
<label id="p1">Gender          </label>
Male  <input type="radio" name="gender" value="male">
Female  <input type="radio" name="gender" value="female">
<br><br>
<label id="p1">Course Title     </label>
<select class="indata2" >
<option>Computer science</option>
<option>Physical Science</option>
<option>Communication & studies</option>
</select>
<br><br>
<label id="p1">Date of birth </label>
<input type="date" placeholder="" class="indata2" required="">
<br><br>
<input type="text" class="indata" placeholder="Enter Your Address" required="">
<br><br>
<input type="Email" class="indata" placeholder="Enter your Email Address" required="">
<br><br>
<label id="p1">Image of You</label>
<input type="file" class="indata">
<br><br>
<label id="p1">Description</label>
<br>
<textarea cols="35" rows="5"></textarea>
<br><br>
<input type="button" value="Register" id="btn">
</form>
</div>
</body>
</html>Here you can see I used div, form, h2, input, label, select, option tags to create this simple registration form.
Do you know why I here used  . A familiar character entity used in HTML is the non-breaking space:  . non-breaking space means space that will not break into a new line.
what is the <br> tag means? It used to enter line breaks. not to add space between paragraphs.
In <input> tag I used required attribute, It specifies that an input field must filled before submitting the form.
To create this registration form, I used various input types. such as checkbox, radio, text, Date, Email, File, Button. If you want any type, You can add these types in to your form.
Not only that I created drop down list with options in here. The <select> element is a form control , It is mostly used in form to collect user input.
<option> tag exhibits an option in a select list. If you have long list ,you can use<optgroup> to group your list items.
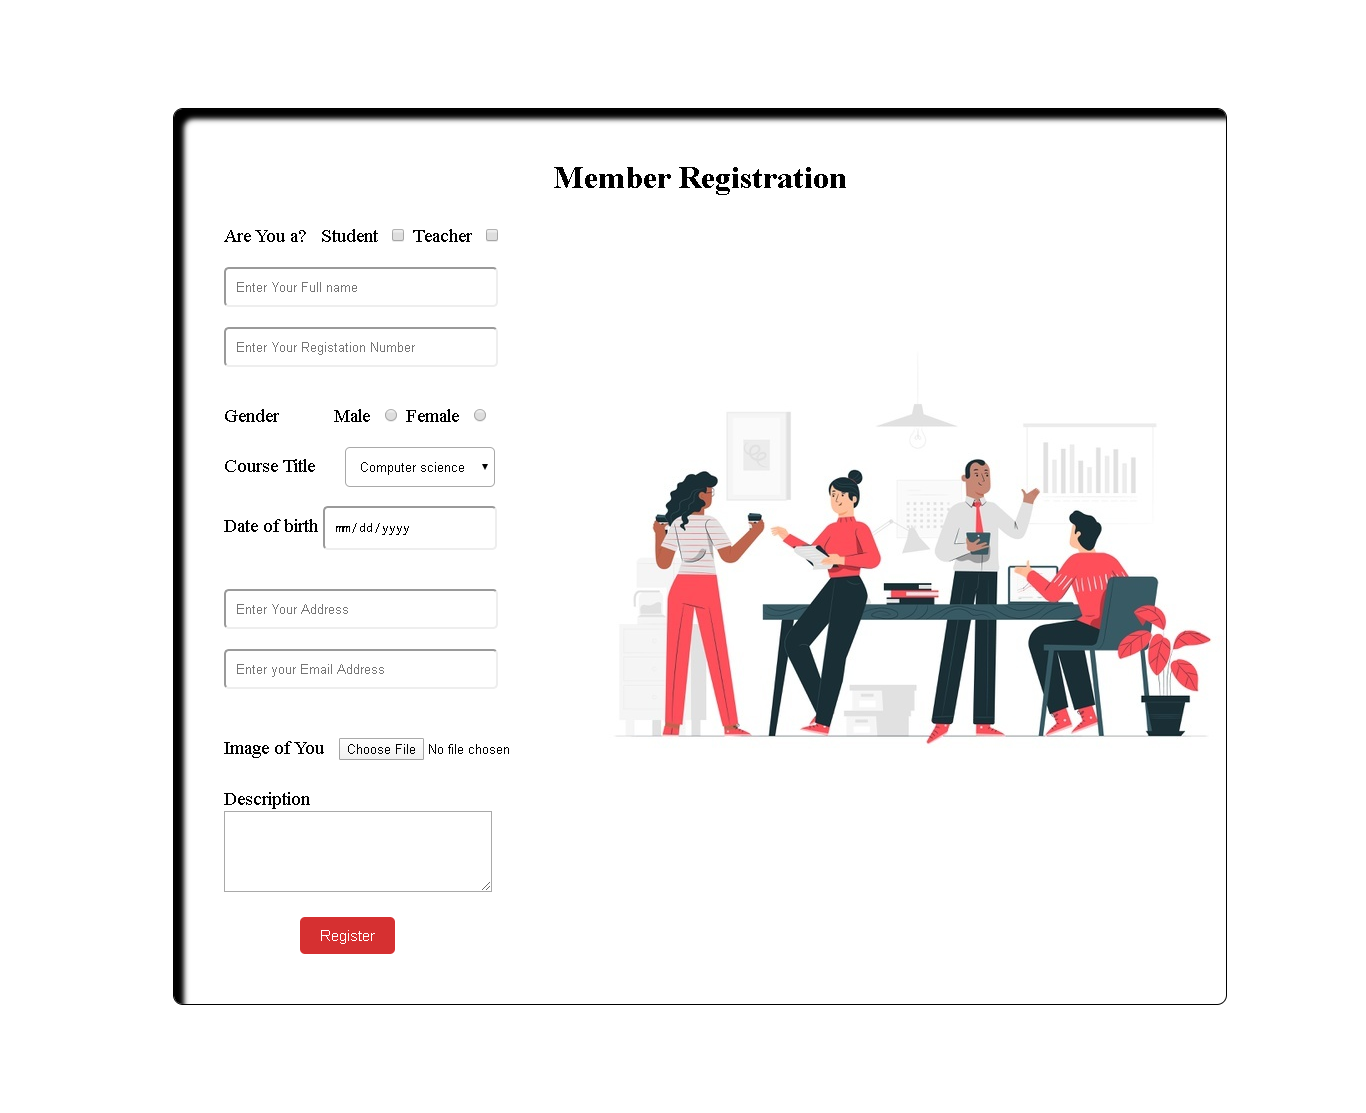
If you entered above code correctly then you can see below page.

Add properties and values
Let’s we design our page.
body
{
	background: #fff;
}

.simple-form
{

	margin: 100px 80px;
	border-radius: 20px;
}
I set background color of the body to white color. Then see what will be change. After entered code you can view below page with changes.

Did you search, here I used id and class attributes within HTML tags. What are they ? Why I used them ? we will see about that.
id attribute used to define a unique id for a HTML element .Because the value must be unique within the HTML document.
The id selector uses the id attribute of an HTML element to select a special element.we can’t start id from a number. It used to find HTML elements you want to style, You have to write a hash(#) character, followed by the id of the element.
#boxThe class selector uses the class attribute mostly used to point to a class in a style sheet.. You have to write a period(.) character, followed by the class of the element.
.indataThen we add other properties and values to design this.
h2
{
	margin: 0 0 30px;
	padding: 0;
	color: black;
	text-align: center;
	font-size:32px;
}
#box
{
	width: 80%;
	background-color: #fff;
	padding: 50px 50px;
        margin-left:85px;
        border-radius:10px;
        border: 1px solid black;
        box-shadow: 10px 10px 5px inset #000;
        background-image: url(img.jpg);
        background-position:right;
        background-repeat: no-repeat;


}
Border property
Border property is shorthand property for
- border-width
- border-style
- border-color
border: 1px solid black;- Here first value specifies width of the border do you want
- second value specifies style of the border
- third value specifies color of the border.
I used box-shadow property with value inset. It defines a 3D inset border. Its’ effect is depends on the border-color value.
Here You can see I added background image . I positioned it into right side by using background-position property. And we can repeat our background ,But here I didn’t repeat the background. For that, I used no-repeat value with background-repeat property.

If you correctly add above codes you can see web page like above picture.
#btn
			{
					border: none;
					outline: none;
					color: #fff;
					background: #d63031;
					padding: 10px 20px;
					cursor: pointer;
					border-radius: 5px;
					margin-left: 8%;
					font-size: 15px;
				}
In HTML file you can see I added id attribute in Button input. here I get it to CSS file using hash with btn (name of the id).

Then we design our other input items.
.indata{
	width: 250px;
	padding: 10px;
	border-radius: 5px;


}
.indata2{
	width: 150px;
	padding: 10px;
	border-radius: 5px;
	font-size: 13px;
	padding:10px;
}
#p1{

	color: #000;
	font-size: 19px;

}
#p2
{
	width: 90px;
	padding: 10px;
	border-radius: 5px;
}
If you add above codes correctly then you will see your web page like below.

So, I think you will try these things. Do more and more to improve your skills. Thank you a lot and keep with Maztars to know more and we will be soon with the next part. And also please share this with your friends and if you have a problem, you can comment here.